

How to Adjust A One-Size-Fits-All Ring Yourself?2024-04-11
I want to wear a one-size-fits-all ring, but I want to adjust it myself because it's too big or too small. However, I'm worried that if I adjust it incorrectly, the ring may become distorted or break. Because of this, I think some people hesitate to adjust the free ring size . However, it would be a waste to keep a one-size-fits-all ring that you bought (or was given as a gift) to fit your finger. Therefore, in this article, we will explain how to skillfully adjust a one-size-fits-all ring by yourself .
How to adjust the one-size-fits-all ring to “expand” it?
There are two ways to spread a free size ring: ``Using a size rod (ring gauge rod)'' and ``Using a ring stand.'' There are other methods, such as using a magic pen or lipstick, but we recommend these two methods to spread the ring neatly and neatly on your own.
What is a size rod (ring gauge rod)?
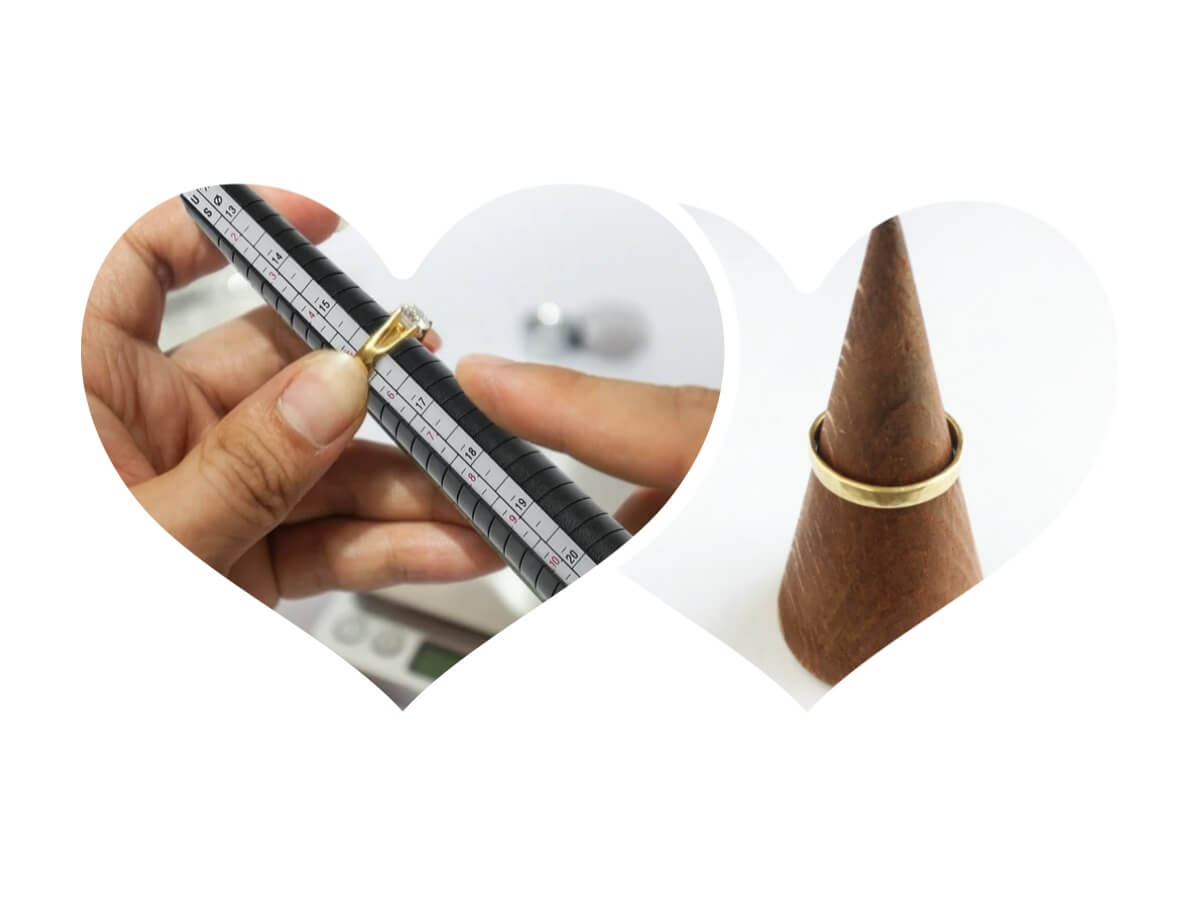
A size stick is a long thin stick used to measure the size of a ring, and is also called a ring gauge stick. It is always available at jewelry shops that make custom-made rings. The smaller the number of the ring, the thinner the tip of the stick, and the larger the number, the thicker the stick. I think there are only a few people who already have one at home, but since it is easily available on online shopping sites, it might be a good idea to take this opportunity to purchase one.
What is a ring stand?
A ring stand is a cone-shaped item that can be used to store or display rings, similar to the red cones used for construction work and traffic control. Just hang the ring on the sharp end, so it's easier to use than storing it in a jewelry box. You can also display your favorite rings neatly just like in a store.
How to use a size rod (ring gauge rod)?
1: Pass the ring that fits you perfectly through the ring gauge rod.
2: Check which scale on the ring gauge rod the ring that suits you will stop at, and either memorize the number of scales or use masking tape to mark it clearly, then remove the ring from the rod.
3: Pass the free size ring through the ring gauge rod, starting from the narrowest end.
4: Apply pressure to the ring and gradually spread it in the direction of the thicker stick (the one with the larger number of marks).
5: Spread the ring to the scale you memorized or to the masking tape position and you're done.
At this time, be careful not to apply too much pressure all at once, as it may spread too much or become distorted, making it impossible to form a beautiful circle. By the way, if you have a wide ring, you can spread the size more evenly by first passing the ring through the ring gauge and spreading it out, then removing it from the rod, turning the ring upside down, and repeating the same process.
How to use the ring stand?
1: Place the ring that fits you perfectly on the ring stand.
2: Use a pencil, pen, or masking tape that can be erased later to mark the line below the set ring, then remove the ring.
3: Next, set the free size ring on the ring stand and spread it little by little while applying pressure to the ring.
4: Spread the ring out to the marked line and you're done.
Ring stands can be made of transparent acrylic or made of wood, but if you apply pressure to a transparent acrylic item, it may get scratched and the ring stand will lose its transparency. Therefore, you need to be careful how you apply pressure.
How to adjust a one-size-fits-all ring to make it smaller?
If you want to make a one-size-fits-all ring smaller, you can make it smaller by hand and then use the ``spreading'' method described above to make it a beautiful circle . We'll show you how to do it with some tips, so please give it a try.
How to make it smaller with your own hands?
1: With your non-dominant hand, hold the center of the ring between your thumb and index finger to firmly secure the ring.
2: Next, use the thumb and forefinger of your dominant hand to apply pressure evenly to both ends of the ring and shrink it until it becomes smaller.
3: Shrink it to a slightly smaller size than you expected, and then use the "spreading" method to finish it off to give it a nice shape.
When shrinking your ring, use your dominant thumb and index finger to apply even and balanced pressure to both ends of the ring. If you use a hand that you are not used to using, it will be difficult to apply even pressure and may cause distortion, so please use your dominant hand to adjust the size whenever possible. We also recommend shrinking it to a slightly smaller size than the perfect size and using the method introduced in the ``expanding'' method to create a beautiful round shape
*If you would like to know more about ``What to do when your ring is loose,'' please also check out this article.
- Company Info
- Customer Reviews
- About Us
- Contact Us
- Blog
- User Center
- Forget Password
- My Orders
- Tracking Order
- My Account
- Register
- Payment & Shipping
- Customs & Taxes
- Locations We Ship To
- Payment Methods
- Contact Us
Address: #5 Shuitian village, Shiyan Town, Bao an District, Shenzhen, China.
Business Hours : 9:00 AM-6:00 PM
Email: info@jclovejewelry.com
 Leave a message